Port Forwarding On Atlas Networks Leased Routers
Port forwarding allows certain services to pass through your firewall - users should be advised that opening unnecessary ports or utilizing the DMZ feature can leave devices on your network exposed to malicious attacks. Users should open only ports they are instructed to open by the support group of the product/service they are creating a port forward for. There are two types of port forwards available on the Atlas Networks leased TP-Link routers; a one-to-one port forward which opens a port for a specific device only and port triggering, which will automatically open a port for any number of devices when those devices make an outbound request on a specified port. Follow the advice of your service provider/product manufacturer when creating port forwards.
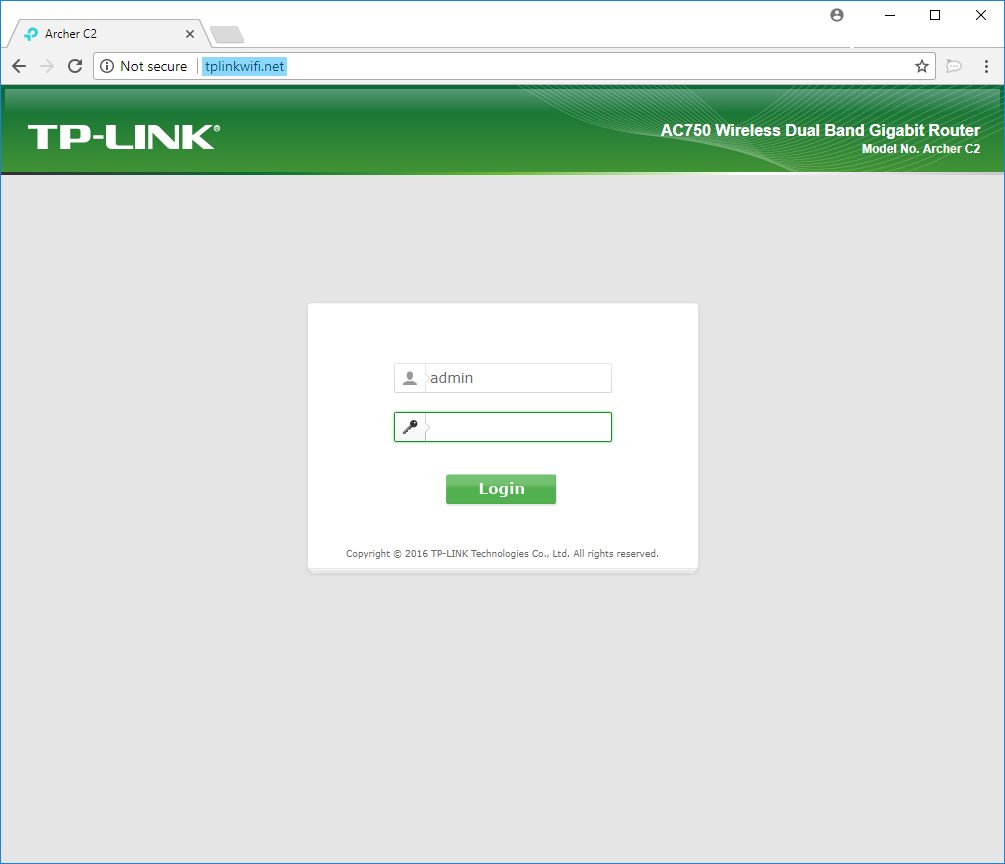
To log into your leased TP-Link Archer C2, open a web browser and type in "tplinkwifi.net" (or enter the router's IP address, which by default should be "192.168.0.1"). By default, the username and password are both "admin". |
 |
| Creating a Virtual Server |
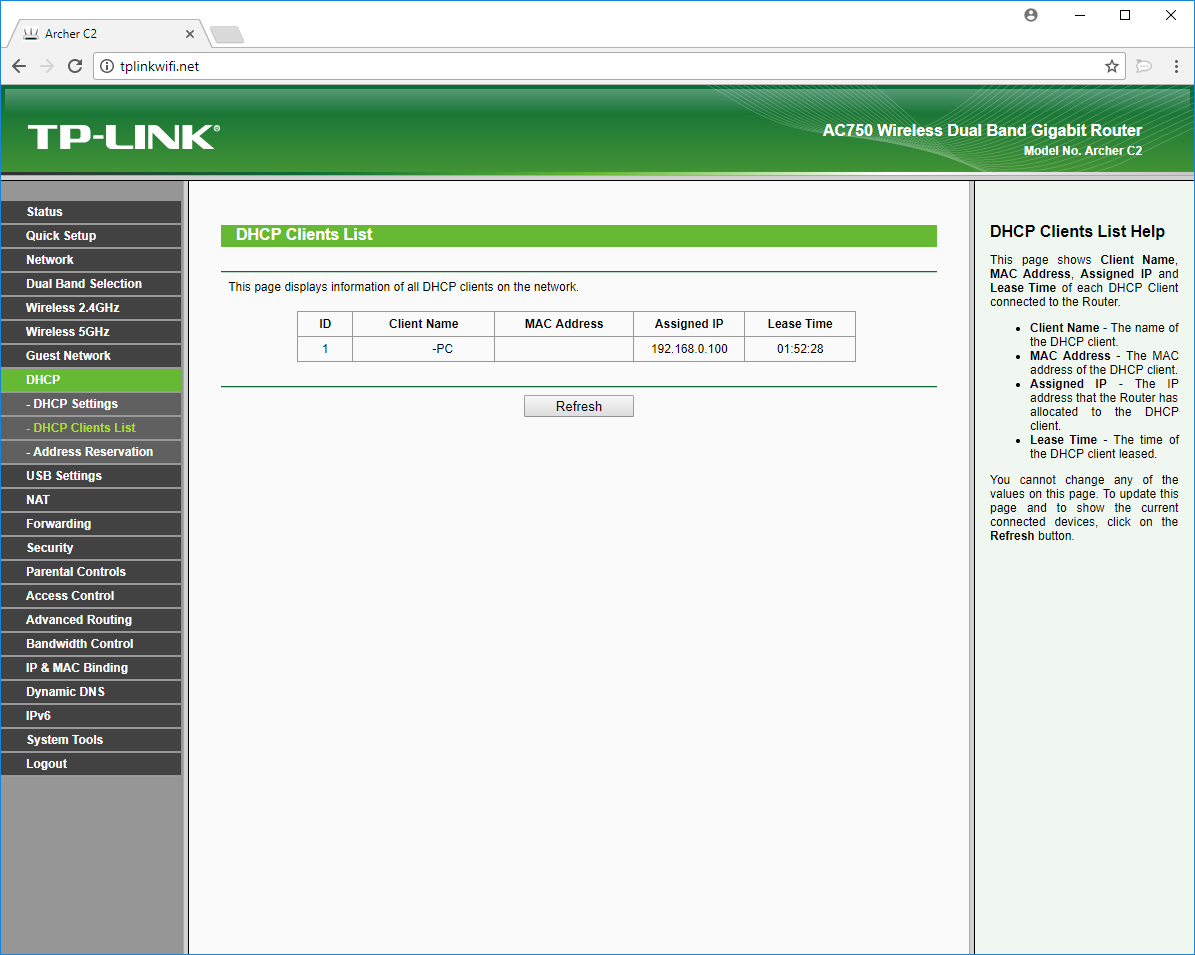
| Once logged into your router, click on the "DHCP" option in the left-hand menu. After doing so, a submenu will open - select "DHCP Clients". This will list all devices connected to your router - unless you have assigned them a static IP address. Attempt to locate your device using its "Client Name" - if you are unable to determine which device is the one you are looking for, consult with the device's manufacturer for assistance in locating your device's current IP address (or contact Atlas Networks support for assistance). |
 |
|
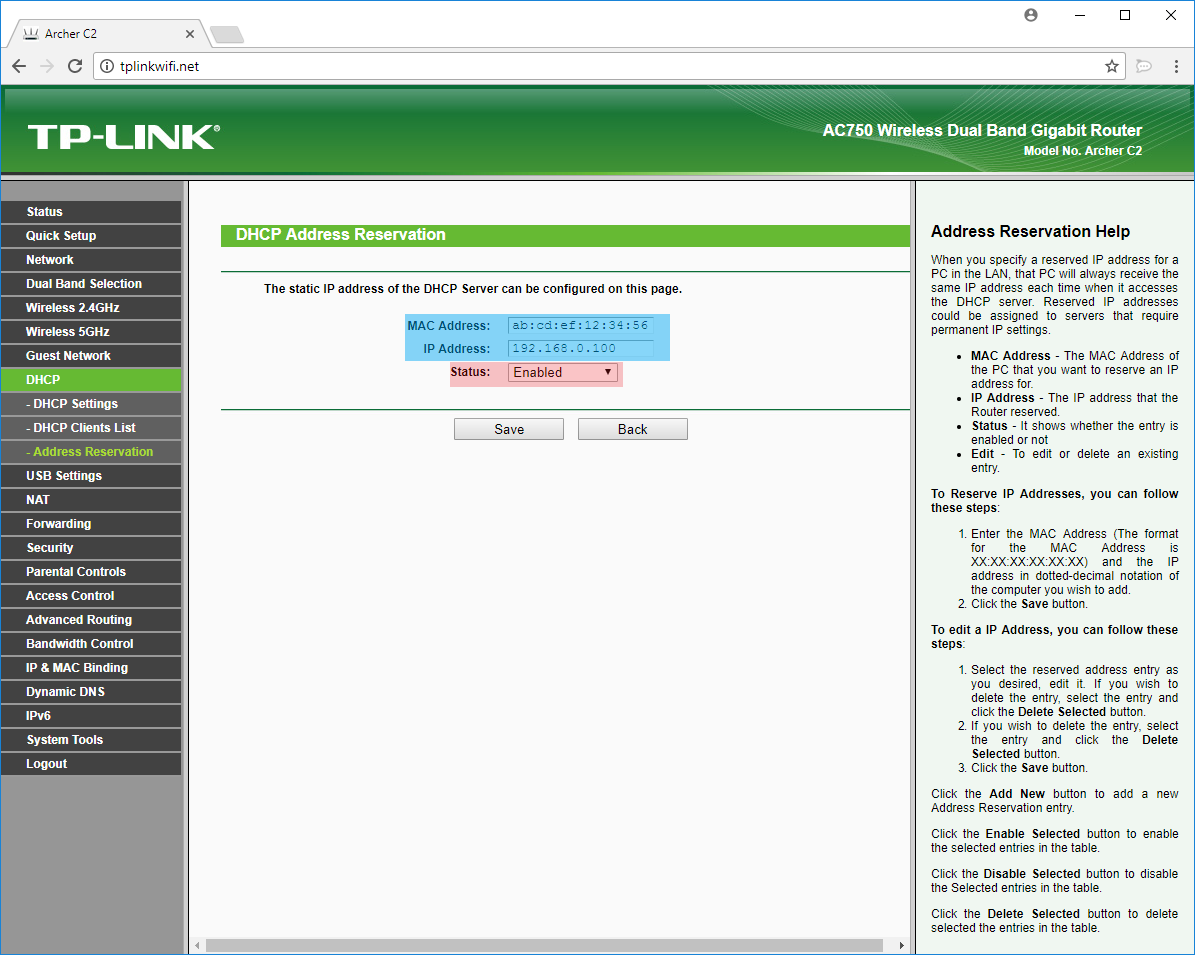
Note down the MAC address and the IP address of your device, then click on "Address Reservation" on the left-hand menu. Select "Add New".
Enter the MAC address and IP information from the previous steps into the corresponding boxes. Ensure that the status is set to enabled. Click "Save".
|
 |
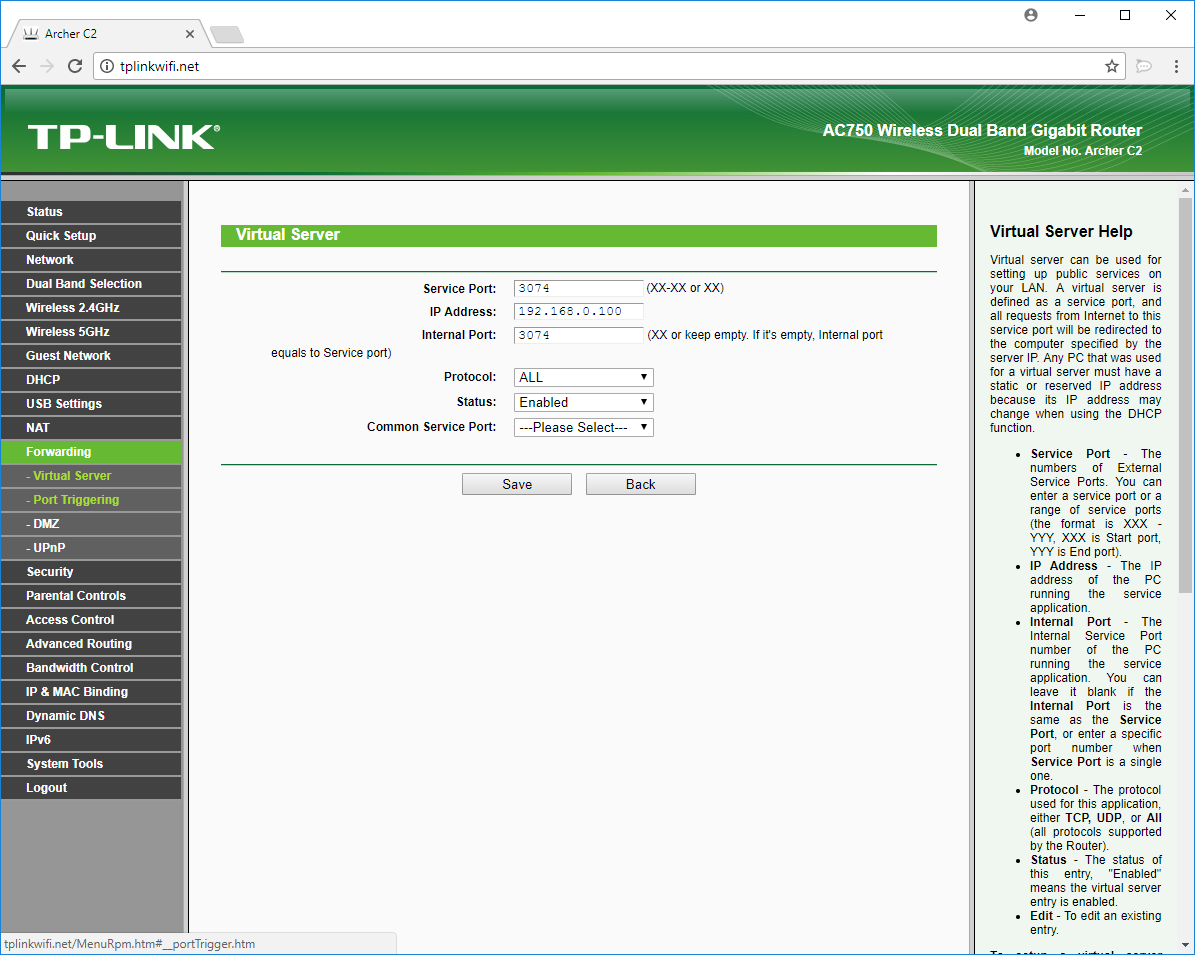
Select "Forwarding" from the menu on the left. This will take you to the "Virtual Server" page, click on "Add New".
Enter the port you would like to open in the "Service Port" box - for most purposes you may leave the "Internal Port" box empty. Enter the IP address of your device - obtained previously - in the "IP Address" box. Choose the protocol (TCP/UDP/Both) associated with the service you are setting up the port forward for (commonly used port forward setups are listed in the "Common Service Port" drop-down menu). You may obtain port and protocol information from the support site of the product/service that you are setting up port forwarding for. Click "Save". |
 |
| Setting Up Port Triggering |
|
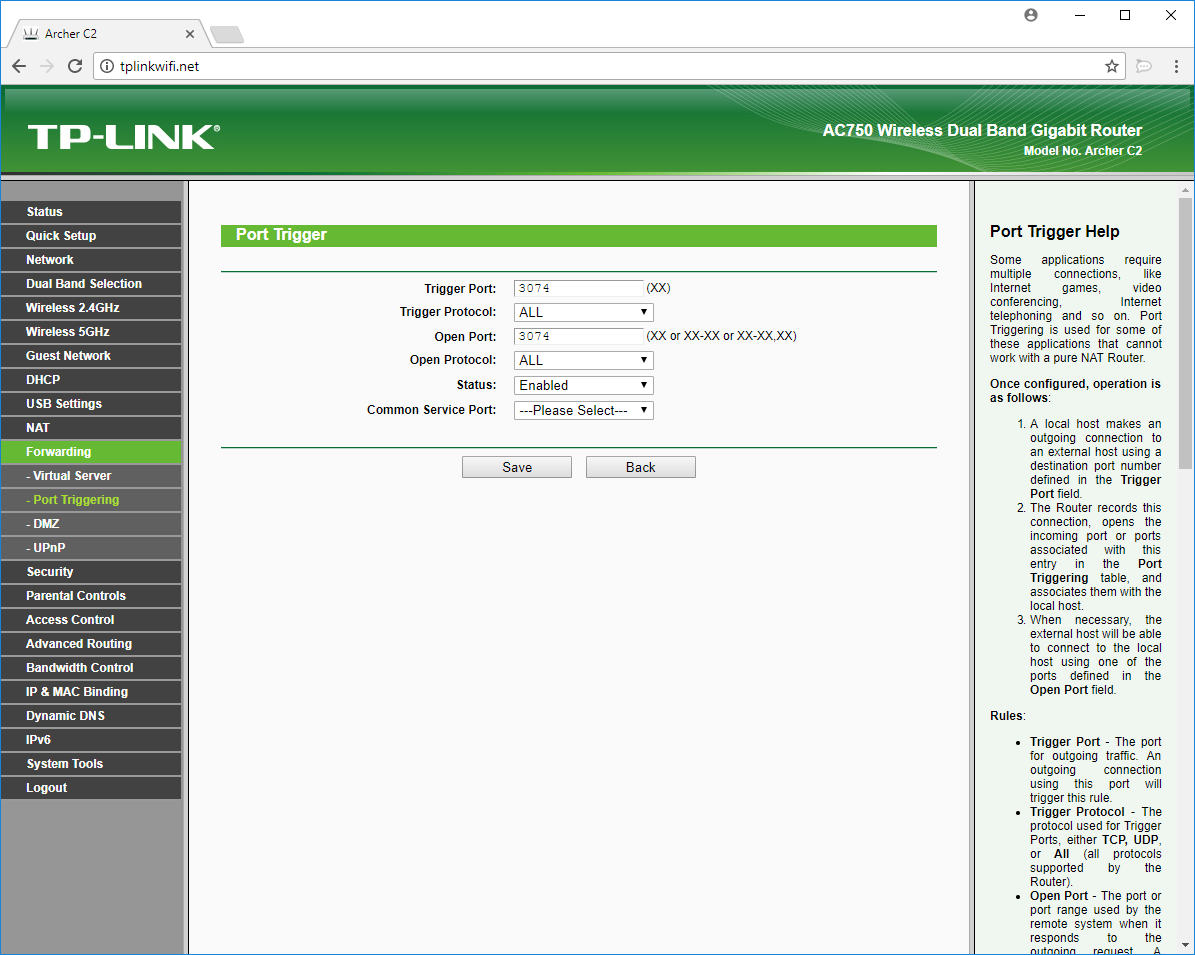
To setup port triggering - allowing the router to automatically open ports for multiple devices, when needed - select "Port Triggering" under the "Forwarding" left-hand menu section. Click on "Add New".
Enter the port and protocol information associated with the service/product you are creating port forwarding for - this information is typically available from the support site of said service. Commonly used port triggering schema are listed in the "Common Service Port" drop-down menu. You may utilize these to setup port triggering for commonly used services such as Battle.net and Quicktime. Click the save button.
|
|
|
- Router, Internet, firewall
- 0 Users Found This Useful
Related Articles
Slow Internet Speeds
This article is intended for those who are experiencing issues with slow wired connections speeds...
Wifi Troubleshooting Tips
If you are having issues with your wireless connection here are a few things you can try.
Please...
Powered by WHMCompleteSolution
