TP-Link Archer C-Series: Change Your WiFi Network Name and Password
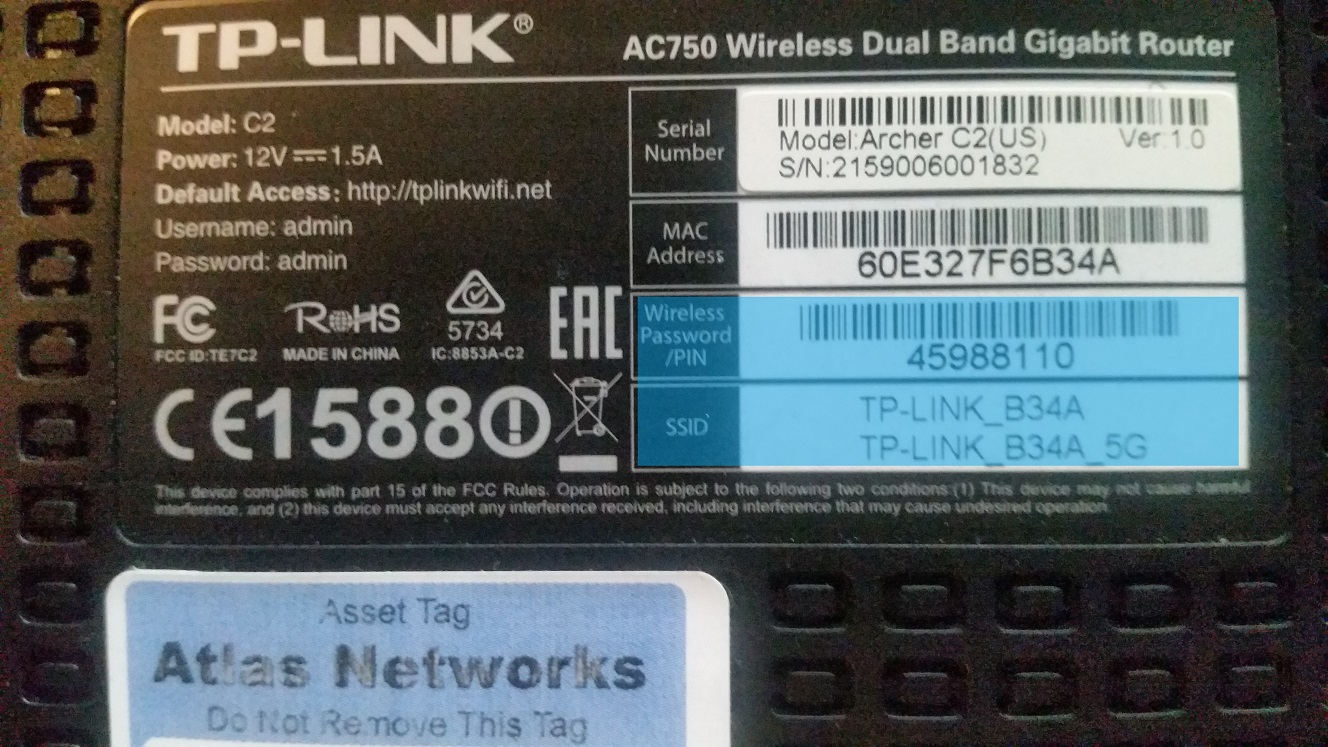
| Begin by locating your TP-Link Archer C2 router and checking the label on the bottom for the default network name (SSID) and password. This information is located on the largest label on the bottom of your router. The third barcode from the top contains your default WiFi password and the label beneath it will contain two network names. Connect to the network which ends with "_5G" if possible - hardwiring a laptop directly to your router using an ethernet cable will make this process simpler. If you do not see the default networks and are unsure of your network name or password, press and hold the WPS/Reset button on the rear of the router for 10 seconds in order to restore it to its factory defaults. Wait for the default networks to appear in your list of networks and connect using the default password. |
 |
| Once connected to the network, open your web browser and enter the address "tplinkwifi.net" - alternatively, you can enter 192.168.0.1 if tplinkwifi.net does not work. |
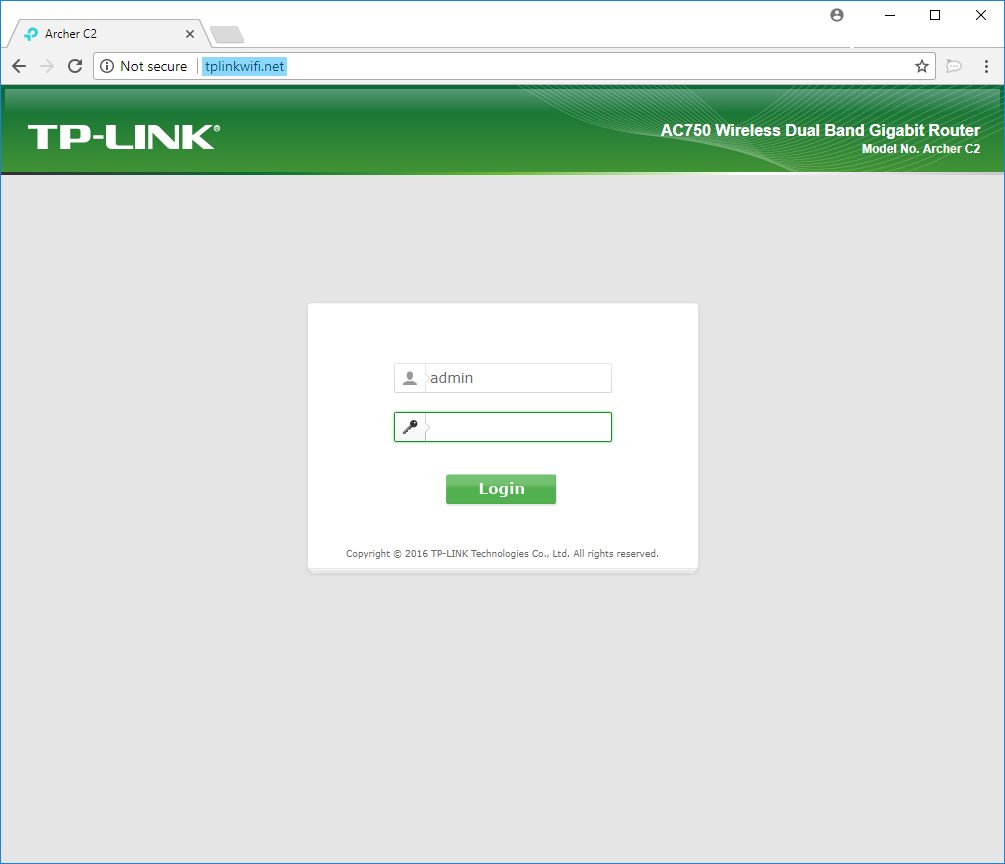 |
| Once you reach the TP-Link login page, enter the username and password (by default these are both the word "admin"). If the default password does not work, reset the router to it's factory default settings by locating the WPS/Reset button on the back of the router and holding it down for 10 seconds, repeating the previous steps once the lights on the router have come back on. |
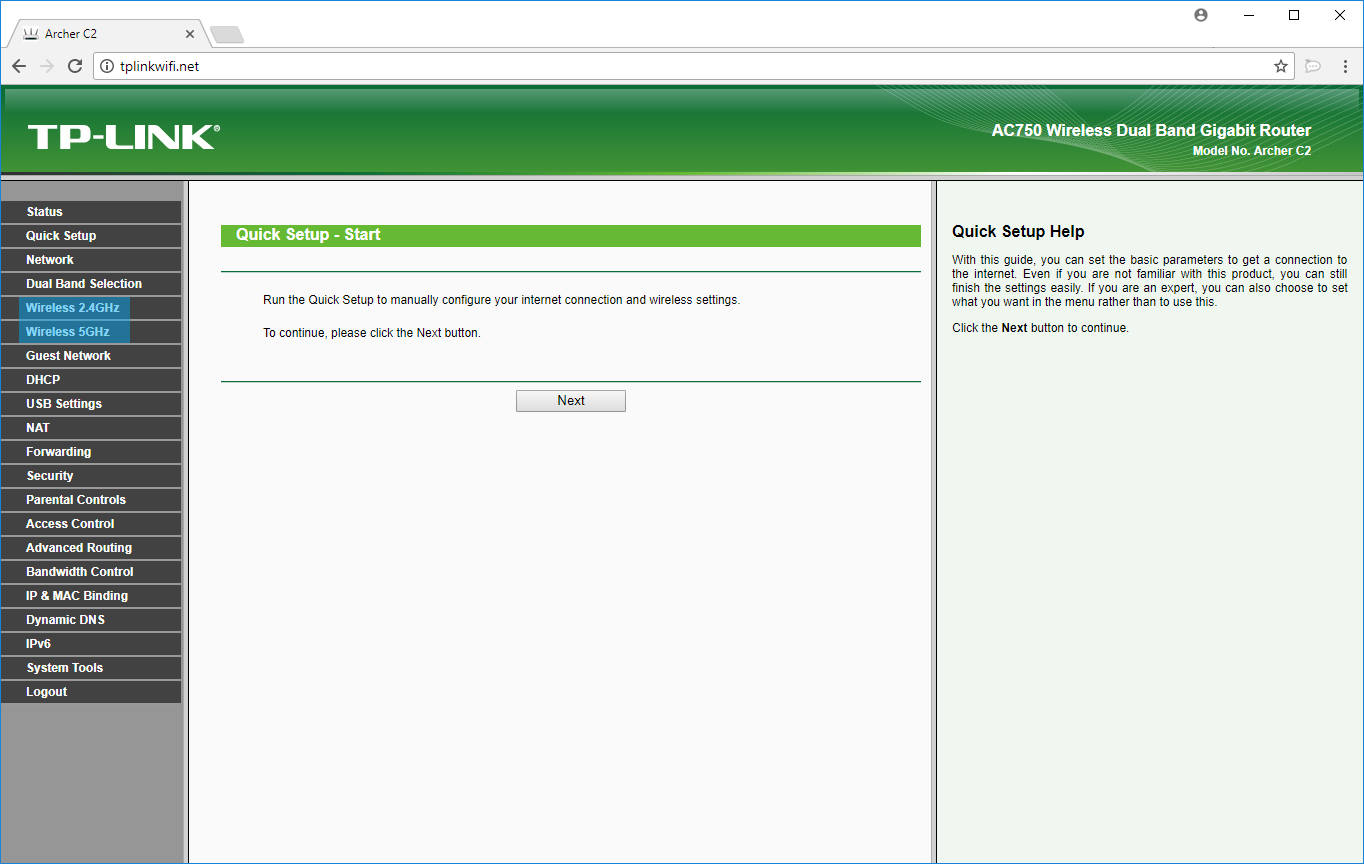 |
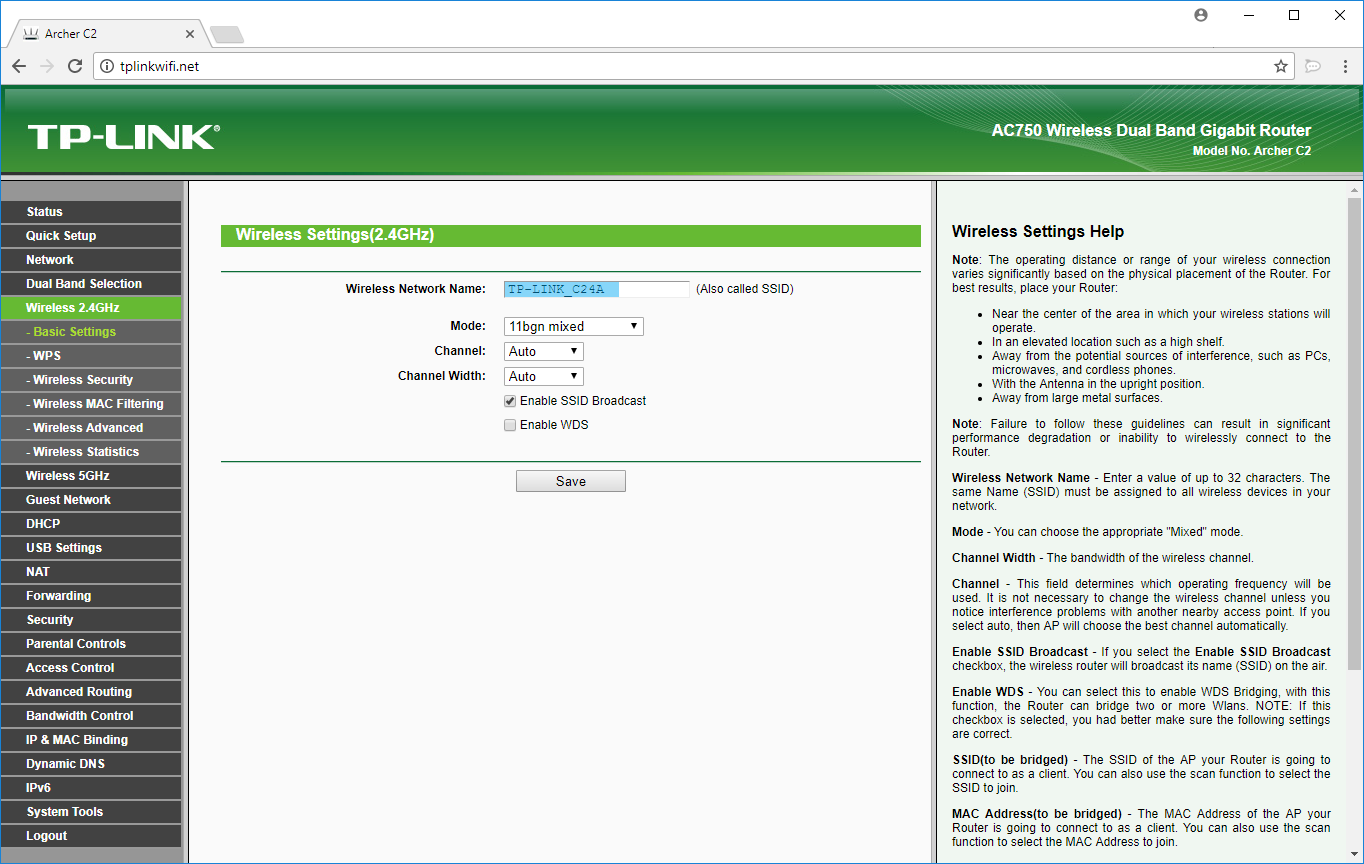
| If you have connected to the network ending in "_5G", click on the "Wireless 2.4GHz" option in the menu on the left-hand side of the screen (if you connected to the network which does not end in "_5G", click on the "Wireless 5GHz" option instead. This will take you to the basic settings for your WiFi. Change the "Wireless Network Name" to your desired network name. Add "_2G" or "_5G" to one of the network names, so that you will be able to tell the 2.4 GHz and the 5 GHz networks apart. It is important to change the network you are not connected to first, so as to avoid being disconnected prematurely. |
 |
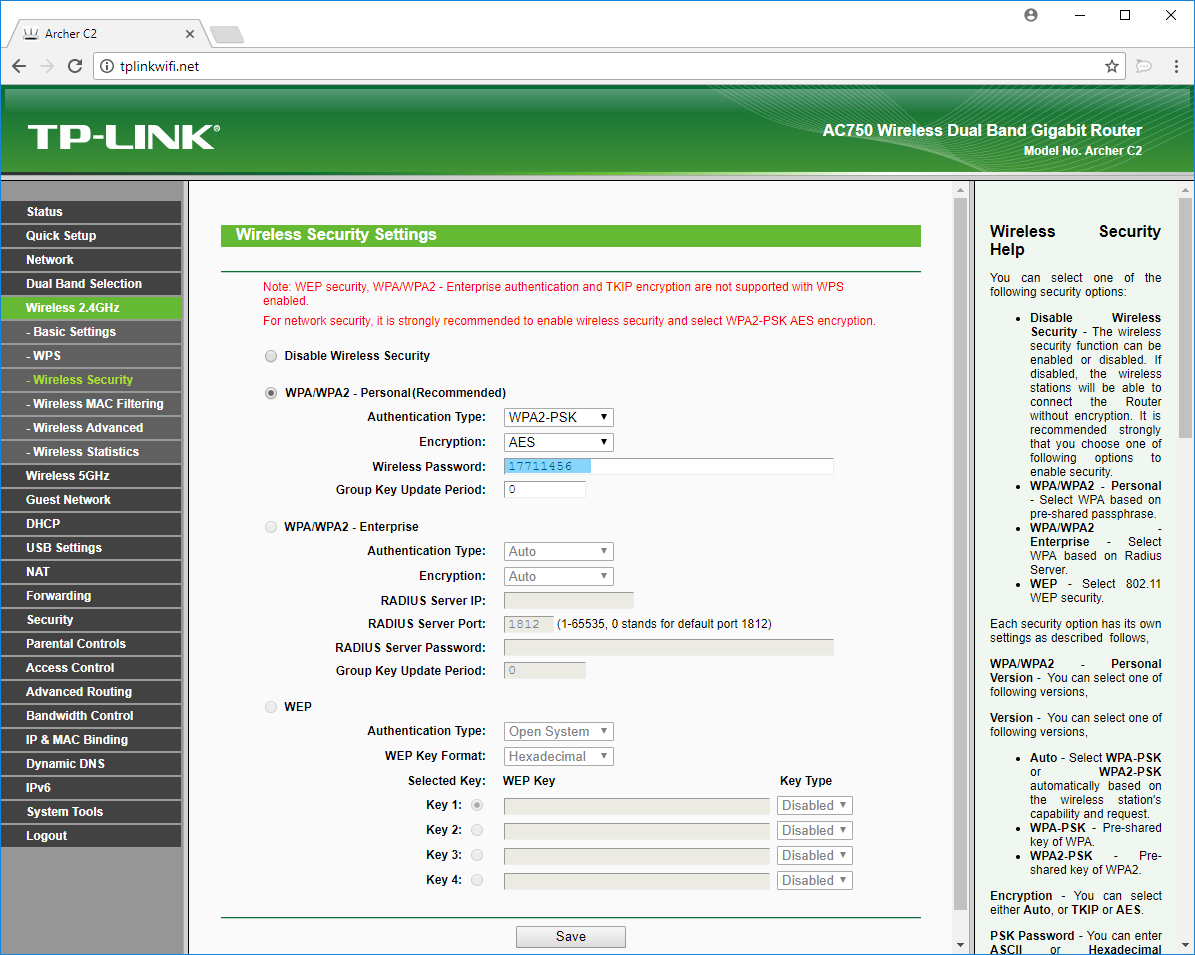
| Once you have clicked save on the basic settings, click the new "Wireless Security" option in the left-hand menu. This will take you to the wireless security settings page for the network you have currently selected. By default the security type should be set to "WPA/WPA2 - Personal(Recommended)" - leave this setting in place. Locate the "Wireless Password" box and enter your desired WiFi password. Click save. |
 |
| Your router will begin broadcasting the new network name with the new password momentarily - if you have been disconnected after changing the first network, connect to the new name with the new password and repeat the previous steps to ensure that both networks have the correct names and passwords. Once both networks have been changed, we suggest connecting to the 5 GHz network for performance reasons, though some devices will work better on the 2.4 GHz network depending upon the range and age of the device, among other factors. |
- Internet, Router, wifi
- 21 Users Found This Useful
Related Articles
Slow Internet Speeds
This article is intended for those who are experiencing issues with slow wired connections speeds...
Wifi Troubleshooting Tips
If you are having issues with your wireless connection here are a few things you can try.
Please...
Powered by WHMCompleteSolution
